Sunday, September 11, 2011

Improvisationally Challenged

After spending most of the day in bed popping Advil Cold & Sinus, I can finally lift my arms above my waist and keep my eyes both open and focused simultaneously.  Unfortunately, it's after four o'clock in the morning now, so "awake" isn't terribly convenient.  (Stupid antihistamines).  Nevertheless, I've been laying here thinking about my shortcomings as a quilter.  Specifically, my utter lack of ability where improvisational piecing is concerned, and my incapacitating fear of combining bold prints in close proximity.  (I have others, of course...  These are just the few featured today in my drug-induced stupor).

Juli Ann's fabric picks for this month's "Meet Me In St. Lou Bee" Blocks.

My lovely friend and fellow St. Louis Modern Quilt Guild member Juli Ann recently asked us to mix improvisational piecing with some really beautiful bold prints for this month's "Meet-Me-In-St. Lou Bee."  The blocks were due today at our monthly STLMQG meeting, which I sadly had to miss.  :(  I realized, though, as I "tweeted" my pending absence to friends this morning that mixed in with all of that disappointment was the teensiest sigh of relief.  At the time, I thought I was just relieved to spend the day in the horizontal position, but the longer I thought about it, the more I realized that I was actually really intimidated by having to share my blocks with the ladies this month.  I've seen previews of many of their blocks on Flickr in the past week or so, and mine just don't seem to fit.  As a teacher, though, I know that the only way to really improve at something is to let the experts help you work through your mistakes.  I had hoped to do some of this today (yesterday, now, I guess) after our meeting, but alas, I wasn't really fit to maneuver heavy machinery across the river.  So, in an effort to swallow a heaping spoonful of my own medicine, I'm posting my blocks here for the time-being, along with my thoughts on what's wrong with them, and a request for any tips/tricks you'd be willing to share from your own experiences mixing prints and piecing improvisationally.  For the record, we were shooting for blocks similar to these posted by Alissa Haight Carlton of Handmade by Alissa:


Here goes.

Block 1:  Cage the Songbird


Generally, I do a lot of quilting with solids, and like a lot of contrast in my quilts, so the idea of the shot cottons paired up with the white appealed to me.  Beyond that, though, I was stuck.  I wanted to fussy cut the bird, and a few of the spirals because of their graphic nature, but I think the result is a little too matchy-matchy compared to the rest of the blocks I've seen, all of which seem more varied and vibrant than mine.  As an example, I actually fussy-cut little snippets of the brown/pink/red fabric and pieced them together to frame out the spiral in the top-left-hand corner while avoiding the giant, fluorescent orange floral in each.  The bit of orange you do see there has been pieced in purposefully, as I had the intention of tying the orange back in later (which never actually happened, due to the complete explosion of pink across the rest of the block).   See what I mean?  (Poorly-) planned improv.  Just doesn't seem right to me.


Block 2:  Empty Garden
(aka Elton John - The Melancholy Emoticon)


I don't know WHAT the hell happened here.

I liked the notion of off-setting the frames to the side, and I'm good up to the layer of Tula Pink framing out the gold.  What happened next is anyone's guess.  

The weird little strip of red in the middle was inspired by this quilt top, which I love, by the amazingly talented Karen of Blooming Poppies, but after working this in, along with the tiny little spec of red in the bottom white border, I just kind of forgot about it.  I had wanted to tie in little bits like this throughout the entire block, but then I revisited some of the bee blocks on Flickr, and realized that this was really not looking at ALL like the "wonky-log-cabin/drunk-love-gone-crazy" direction in which I was supposed to be heading.  So, I finished piecing the last few borders, trying my best not to butt any two disparate prints side-by-side.  When I stepped back to look at it, though, this is all that I saw:

:|

Melancholy emoticon.

Of course, when you combine that with the flowery frame surrounding the gold square, you have what looks like a melancholy emoticon wearing a vintage Elton John monocle.

At this point, I was really depressed.  Juli Ann is an artist by trade.  Her quilts are somehow both bold and striking, but quiet and beautiful at the same time.  She has an amazing aesthetic.  She was also the first friend I made in the quilt guild, the person who most put me at ease during a sudden social-panic attack at Laura Gunn's house, and considering my natural inclination to keep to myself in large groups, probably the only reason I get to enjoy spending time with this wonderfully funny and talented group of ladies each month.   I wanted so badly to make her something strong to add to her quilt to thank her for all of those things.  Instead, I slid these two unhappy blocks into my 2-gallon Ziploc bag, and let out a long, frustrated sigh as I settled into the futon for the night.  Sad songs say so much.

When my alarm went off at 5 AM the next morning (this would be Friday), I flicked on the light and stared at the mass of scraps I had left on the table from the night before.  Too dejected to pack them up for her just yet, I headed to the bathroom to shower up.  There's no fan in the bathroom, so the mirror is constantly fogged.  I took a washcloth and wiped it clean, starting in the top-right corner, and working my way log-cabin style around to the middle.  I went upstairs, and used up the rest of the waffle batter from Emma's birthday breakfast the day prior to make breakfast for the kiddos.  Put out a soft stick of butter, and reached in the pantry to find a brand-new bottle of Log Cabin syrup.  Got to work, ran to my boss's office where he was showing a colleague a bizarre set of greeting cards the University had issued him last spring with Abraham Lincoln on the front.  Abraham Lincoln.  Who grew up in, you guessed it:  a log cabin.  It was pretty clear the quilting universe wasn't done messing with my head over this little fiasco.

When I got home from the parish picnic late Friday night, I was already feeling under-the-weather.  Between my fever, chills, and the constant loop of "I Guess That's Why They Call It The Blues" cycling in my head, things were looking kind of gloomy.  In an effort to redeem myself and salvage some small part of the day, I sat down at the old Kenmore with Juli Ann's scrap pile and just started sewing.  Not really thinking about much of anything, just pairing up scraps from smallest to largest in a quick and wonky log cabin.  I don't know if it was the sinus meds or just the fact that I was starting with scraps (so if I screwed up now, no pressure, right?), but whatever the reason, I think I like this last block the best:


Block 3:  Wonky Cat


I know the print-matching isn't necessarily the best here, but considering it was all that I had left, I'm actually okay with it I think.  I do like the wonky nature of this block.  It feels closer to the others that I've seen, which makes me think it will work more harmoniously with the rest and not stand out as an eyesore the way the others might, I fear.  Either way, this was a tough bee month for me.  If I had it to do over again, I think I'd make them both log cabin blocks, but pair the fabrics to show a little more contrast.  As it is, the piecing here is a bit lost in the shuffle.  Regardless, I have to thank Juli Ann for the learning experience.  And, everything else for that matter.  :)  I'm happy to re-make these if need-be now that I have a little more confidence in the process.  Still can't say that I'm comfortable working with such varied prints yet, but, you have to start somewhere I guess, and I'm still standing.

;)

What do YOU consider when mixing bold prints together?  How do you approach improvisational piecing?  Not rhetorical.  I'm really asking.  :)


Monday, August 29, 2011

Climbing the Walls (Part III, the Conclusion)

...cont'd from Part II.


When I first started stripping, I kept things pretty organized:  first, by size within color...


...then, solely by color.


Once the strips were all cut, I trimmed 36 squares of copy paper to 8.5 x 8.5 inches square, and prepared each for paper piecing the string blocks.  I drew a pencil line across the diagonal of each square, marking additional lines 0.75 inches to either side of the diagonal as shown.


Using just a touch of fabric glue, I temporarily adhered 1.5-inch strips of heavily-faded denim to each of the 36 squares along the diagonal.


Next, I randomly pieced each block using the denim strips cut previously, doing my best to alternate size and maximize contrast between sets of strips as I progressed.  When each paper block had been completely covered with fabric, I turned them face-down, trimmed the excess fabric along the lines of the paper and ripped the paper from the backs to give 36 strip-pieced blocks...


... and a whole mess of these:


I played with the layout for "a while,"  (you know, the way reading War and Peace takes a while?), and eventually landed on this:


Which, according to my husband, gave my father-in-law a serious case of vertigo.  ("If I look at it too long, it's like I'm falling into it").  That's right, Dad.  Try not look directly at the quilt.

After cursing my way through a WHOLE lot of denim meeting up at the corners (can you hear my Kenmore chugging "I THINK I can, I THINK I can?"), I decided I'd had enough, and took an unofficial break from the blue stuff for "a while."

You know, the way black bears pack on 30 pounds of body fat, then nap for a while?

I developed quite a nice little case of ADD during my hibernation.  (Avoiding Denim Disorder).  Pieced a few bee blocks for a friend.  Designed a lap quilt for a swap partner.  Created a messenger bag for the St. Louis Modern Quilt Guild's Rip-Rip-Ripping Challenge using bits of transparent shower curtain and a selection of elements from the periodic table.  All the while, the denim quilt lay there, backless, and mocking me.

When I finally managed to focus again, it was time to decide what to do for the backing.  Although Dawn had asked that we skip the batting (the denim itself heavy as it is), she had specifically requested either flannel or fleece for the backing.  She initially considered something whimsical and fun in honor of Jordan, but having already strayed so far from my comfort zone, this was a little more than I could swing:

           
So, I made the executive (predictably dull) decision to match the fleece on the back with the colors on the front and go with navy blue instead.  I purchased two separate, high-end flannels for the backing, only to wash them both and have them pill like the dickens.  I finally decided to go with fleece instead, which not only provided me with anti-pill options, but also gave me the opportunity to personalize the quilt for her as well.

I purchased anti-pill fleece in both navy and sky from a local fabric store.  I then searched the web for a whimsical font I could steal download for tracing the letters.  I eventually decided on this one from "Art of Graffiti," which I enlarged to 200%:


  I traced the letters of her name onto the dull side of a small sheet of freezer paper.


Using the finished name as a guide, I cut a small swatch of sky blue fleece large enough to span the width and height of the letters and pinned it to the wrong side of the navy blue backing.  I then pressed the freezer paper shiny side down onto right side of the navy blue backing and directly over the spot where the sky blue swatch was located.  


Using a very small stitch length, I trace-stitched along the lines of each of the letters of Dawn's name, essentially sandwiching the navy blue fleece between the freezer paper and the sky blue background swatch.


I carefully removed the freezer paper from the right side of the navy fleece.  In an attempt to give a more finished feel to the wrong side of the backing, I used a soft, flexible interfacing to cover the swatch of sky blue fleece and smoothly pressed it to the wrong side of the navy.


Once all of the paper had been removed and the interfacing pressed to the back, I used sharp embroidery snips to remove the top, navy blue layer of fleece within each letter by trimming along the inner edge of stitches, taking care not to cut through to the sky blue background fabric.  (Because of the small stitch length, and the no-fray properties of fleece, you can trim all the way up to the stitch line without issue.  I have made several personalized blankets like this, and after dozens and dozens of washings, not ONE has come apart along these stitch lines, no matter how closely I trim them).


This left me with Dawn's name in sky blue relief against a navy blue foreground:


At this point, I attempted (poorly, and on several occasions) to stitch the denim top to the backing fabric along the diagonal cross-hatch pattern formed on the front, but quickly decided that this was, in fact, too much for my Kenmore-that-Could (as evidenced by a gritty, grinding sound accompanied by the smell of burning gears).  Instead, I stay-stitched the front to the back in about 15 strategic locations, and bound it all up in navy blue Kona.


This quilt is heavy.  Lay-on-your-chest-during-dental-x-rays heavy.  But, considering it's only meant to protect against sharp little kitten claws (as compared to the 2-3 millirem radiation of, say, your typical bitewing series), I think it should do the trick.


One final note to Miss Dawn, in the event that you happen to read this.  It seemed an appropriate homage to our free-running friend to photograph this quilt in its proper setting before giving it to you last Friday.  Of course, if I happen to get a phone call from the construction crew outside asking me to identify the young man currently hanging from the scaffold, I will deny ever having met him, so I apologize in advance for having planted this idea in the first place.  In the meantime, hope the quilt comes in handy, and serves as a small reminder of my gratitude for your boundless friendship and support these past few years.  If it turns out the quilt isn't quite what you had hoped, I'm happy to replace it with another of your choosing.  I suppose you could up-cycle it yet again by returning it here.  Construction workers love denim, right?


Tuesday, August 2, 2011

We interrupt this quilt...


... for a brief anniversary celebration.    Dinner at LaRusso's, and a quiet night away from "home."  Happy Anniversary, Coach.  Best 14 years ever.  -Lynner

Tuesday, July 26, 2011

Climbing the Walls (Part II)


... cont'd from Part I.


[Author's note:  If all goes well this evening, final installment tomorrow!]


Don’t get me wrong.  I love me some denim. Gap dark wash Long and Lean jeans are the only casual staple in my wardrobe (primarily because they have the words “long” and “lean” right there in the title).  But, sewing denim is rather akin to sewing aluminum screening (which I’ve done on my Kenmore, by the way).  It never seems to go well.  Add that to the mental anguish I conjure at the mention of denim patchwork, and let’s face it, it’s hard to imagine how this could possibly end with anything “modern.”  
 
Nevertheless, a week or so later, Dawn arrived at work with two pair of jeans belonging to her son, Jordan.  “They’re a little rough,” she said.  “He’s been doing a lot of free-running lately.”    

Cool!” I answered.  “Not a problem.” 

A quick Wikipedia search later, and I’d discovered that free-running is a non-competitive, extreme sport in which participants maneuver their way from Point A to Point B through a series of acrobatic tricks or stunts with obstacles they experience in their urban landscape.  Such athletes will often jump from building to building or literally flip from fire escapes in an effort to express themselves and their creativity as impressively as possible. 

Free-running scene from recent James Bond movie, Casino Royale.
(http://blogs.whatsontv.co.uk/movietalk/files/2008/10/casino-royale-free_42.jpg)

Indeed, once I’d read it, I remembered being in Dawn’s office a short time before when the principal called to say that Jordan was getting detention for standing on the roof.  I thought it was strange that a student would be penalized for such a thing until Dawn explained that Jordan had actually climbed the side of the building to get there.  While there technically weren’t any rules on the books against it at the time, I suspect the “Jordan Clause” is now firmly immortalized in the local high school handbook.  

Photo courtesy of Metro, online news site in the UK.  (http://www.metro.co.uk/news/79556-free-running-teen-jumps-50-000-metres)


Suddenly fascinated with the athletic side of this nice young man I’ve only ever known to play the mellophone in the marching band, I dug open the bag to investigate.  I have a hard time imagining that denim is actually the textile of choice for this extreme sport.  On the rare occasion that I wear jeans to work, I’ve got barely enough flex to lower myself into a chair, let alone scale the side of a building.  Yet, there they were, just as Dawn described:  Ripped, stained, and enough fringe at the bottom to make Charo swoon.  Add that to the fact that Jordan weighs 98 pounds (dripping wet with rocks in his pockets), and it was clear that we were going to need more fabric.

Good pair of Jordan jeans, minus the usable parts.


A quick trip to the Goodwill store, followed by a brief stay at the laundromat (and a solid week of jean surgery) left me with this partial stack of denim fabric, and a healthy set of hand cramps.  


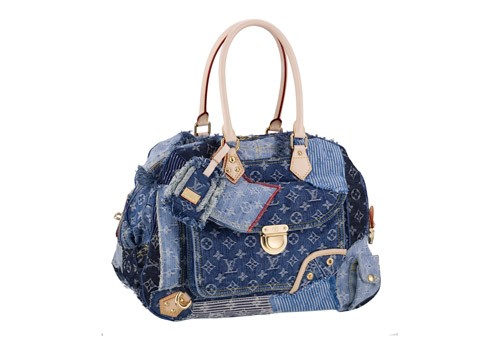
I’d been searching the internet for modern denim patchwork, but with the exception of a handful of rag quilts and a few high-end handbags (here and here), there wasn’t much to be found.  So, the question remained:  What to make?  Enter my talented friends from the St. Louis Modern Quilt Guild.


I had just joined the STLMQG a short time before, and was drunk with happiness scouring the Flickr feeds of my fellow members.  Two beautiful string quilts, in particular, caught my eye (here and here) created by fellow guild members Cara and Mary Claire, respectively.   I had also just received the book The Practical Guide to Patchwork, by Elizabeth Hartman , that just so happened to contain instructions for a string quilt of this type.  So, I ran my rotary cutter through a pile of aluminum foil (does anyone actually think this works?) and started stripping.    

Monday, July 25, 2011

Climbing the Walls (Part I)

[Author's note:  Check back tomorrow for the next installment...  It's kind of a long story].


A few months back, a friend from work asked if I could make her a Kevlar quilt.  Kevlar is the fiber they use to make bulletproof vests, so I was a tad curious as to what she had in mind.  I’m an organic chemist by trade, but the friend in question is not, so I didn’t automatically assume she wanted me to extrude a sheet of polymerized phenylenediamine and terephthaloyl chloride units. Maybe she picked up a sample at the army surplus store and thought a bulletproof blanket would be cool?  Or, caught a glimpse of its chemical structure and simply liked the pattern?  I suppose one could mistake that for a bunch of tessellating hexies…

The skeletal and 3-D molecular structures of Kevlar (http://en.wikipedia.org/wiki/Kevlar).


I asked her what she had in mind.

“I need…” she started to answer, but then scooped up her iPhone and began tapping away.  I stood there for a moment, assuming she would finish, but she kept tapping and clicking and swishing her finger across the screen, until my curiosity (impatience?) got the best of me.

“You neeeeeeeed…” I prompted, watching her finger scroll through a chain of photographs on the tiny screen.  She finally stopped, looked up, and said in a definite “Your-Mission-Should-You-Choose-to-Accept-It”  kind of voice:

“Protection.”

Now, Dawn is a great kidder, but she’s also much smarter than I am, so I can’t always tell whether she’s serious, or if she’s joking and I just don’t get it.  So, I mumbled a non-committal, “Uh-huh,” followed by a thoughtful, “I see,” and stared kind of blankly at her for a few moments.  “From what, exactly?” I ventured, hoping she’d crack. 

“From these!”  she smiled, turning the phone in my direction.  “Bwah-ha-haaaaaaaaaaaah!”

River and Rebel

“Yeah,” I nodded.  “Ferocious.” 

Dawn had lost an elderly pet cat to illness a few months before.  She brought these two little guys home from the Humane Society a short time after.    River and Rebel, presumably named, I suspect, for reasons best not to divulge in this particular forum.  J
   
She said they were great fun, mischievous and busy, but that they were ripping her to shreds.  Never having owned a pet before (except for Charlie, the goldfish I won at the school penny carnival that my sister poked to death on Valentine’s Day, 1984), I wasn’t sure what she meant, so she showed me.

[Wait…  You didn’t think I was going to show you a FLESH WOUND, did you?  Seriously, one of my pet peeves.  Had to un-friend a friend from Facebook because she insisted on posting progress photos of her mother’s gangrenous wound therapy…  Honestly, people…  I haven’t spoken to you since high school.  Did you really think that was going to get me to the reunion this year?]

Where was I?  Oh, right...  The flesh wound.

Her forearm was pretty scratched up, but it was her legs, she said, that caught the brunt of it.  “They’ve taken to using me as a launching pad,” she said, “And, I was hoping you could make me a lap throw for protection.”

“Happy to!”  I replied, always excited for a new project.  “But, not of Kevlar, right?”  (Just to make sure).  “That stuff stops bullets.  I’m pretty sure it can stand up to my Kenmore.”

 “No, no…” she answered.  “I was hoping you could use denim, instead.”

Denim.

Yes. 

Because that would be better.


Tuesday, June 14, 2011

Hammertime (aka The Quilt Formerly Known as 'Sheen')


In January of this year, our St. Louis Modern Quilt Guild kicked off its Robert Kaufman Solids Only Challenge.  Using a Kona Charm Pack in the Classics palette and only one or two additional solid fabrics, we were to design and complete a quilt with an outer perimeter between 120 and 180 inches to present in time for our June 11th meeting.  Having only joined the guild this past April, I got off to a late start, and (will gladly use that as the reason I ) was still hand-sewing my binding on at 5:15 Saturday morning.  Needless to say, one accidental nap later, and I was sprinting out the door, thirty-minutes late.  A rather inauspicious start for the girl who gets turned around the minute she crosses the Mississippi River on her way to our meetings each month to begin with.

Stupid TomTom...

At any rate, the ladies definitely came through, with 44 of our members presenting their quilts to a captive audience.  A few of the photos are up on our STLMQG Flickr page, and I hope we see many more to come.

The inspiration for this quilt was originally the sheen that you see on the back of a compact disk. Each 2.5-inch block was my less-precise version of the Endless Chain pattern available on the Quilter's Cache website, but down-sized to fit our challenge requirements.  Of course, down-sizing meant that the "spoke" corner of each block had nine layers of fabric stacked up at one point.  Once you join FOUR of those points together, that's 9...  18...  27...  A veritable BUTTload of fabric coming together at one seam.  
Photo courtesy of http://www.123rf.com/.


Thankfully for me, May brought a welcome 12-hour quilting retreat sponsored by my local quilt shop, the Quilted Garden, at St. John's United Methodist Church in Edwardsville.  As I fussed and repositioned my 144 tiny squares on the design wall, each of the lovely, God-fearing ladies around me would stop by my table, encourage my efforts, and wish me the best.  Which was all fine and good until I started sewing those mega seams together, and the under-my-breath bleeps started flying.  I was literally standing on my tip-toes, leaning with all of my might on the center of each block, willing the iron (which was steaming up a three-foot radius around me at this point) to smoosh those corners into place when a soft-spoken woman with fluffy white hair tapped me lightly on the shoulder and said, "Here, Honey.  Try this."    

Apparently, when God closes a door, he opens a tool box.

Between this divine intervention, and the spiraling, meteoric downfall of this guy, it was decided a name change was in order.  So, at last, I present to you, Sheen "Hammertime."

More information on the process behind making this quilt can be found on the WIPs tab of this blog.

Thanks for visiting!

WIP: Robert Kaufman Solids Only Challenge - "Sheen"

Photo courtesy of www.123rf.com
The idea for this quilt started with the sheen you see on the backside of a compact disk, and the Endless Chain block I spotted on the Quilter's Cache website.  The charm pack seemed to heavily favor the blue-teal-aqua-turquoise family to me, so the picture above seemed a good initial fit.


The original design called for a 6-inch, paper-pieced block, which I tinkered with until I'd worked out a 2.5-inch prototype using a few Moda prints and some old muslin (read:  thin fabric) I had laying around.  The prototype below shows four of the 2.5-inch blocks joined together, and my overall "plan" for the quilt as mapped out in PowerPoint (poor man's version of EQ).


The Challenge Rules stated that we had to use at least 21 of the 41 blocks provided in the charm pack.  From each of the 39 charm squares I chose to include in the quilt top, I cut seven 1x3-inch strips, which comes to 21 out of 25 square inches possible per charm, or 84% of 39 blocks for a total of 32.76 blocks used.  (Yes, I know...  Geeks 'R Us).

At this point, it was time to start cutting paper:  One hundred and forty-four (144) 2.5-inch squares, to be exact.  I used regular copy paper (spoiler:  BAD idea), and kept them organized in groups of twelve, because...  Frankly...  It just felt less oppressive that way.


Next came the 2.5-inch fabric squares.  Again, 144.  Each of the fabric squares was then individually cut into a kite shape, and temporarily attached to a paper square using fabric glue.


Once all of the kites had been adhered to the squares, I began sewing the colored strips onto the right-hand side of each kite (288 total:  273 from the charm pack, plus another 15 grey I added as one of my two additional colors) .  I had divided the colored strips into two piles, darks and brights.  I sewed and pressed the darks to the right, then sewed and pressed the brights to the left in an attempt to create the illusion of a less-disordered pattern overall.


Once the colored strips had been added, I sewed and pressed fabric strips (1.5x2.5-inches each, 288 total) to the outside edges of each of the colored strips to make these:


I turned each block face-down on the cutting mat and trimmed it to 2.5-inches square, to make this nifty stash of blocks...

From which I STILL needed to remove the paper.

And, there was evening...


And there was morning...


The seventh day.


After a few days' rest, I took my pile of happy little squares (aren't they pretty?) to a 12-hour quilt retreat sponsored by my local quilt shop where I sewed, steamed, and literally hammered my blocks into shape.


At this point, I was wanting to sandwich it, quilt it and bind it in a happy little rainbow print, but my outer dimensions were too small (24x24...  Fourteen years of college, right down the drain...), so I opted to put it on a stark field of white instead.


I had hoped to center a CD on each block and trace around it for quilting purposes, but at this point, the deadline loomed less than 12 hours away, so I opted to skip my first attempts at quilting circles and went with a straight-line diagonal pattern instead, with a few double-lines thrown in for good "homage-to-Film-in-the-Fridge" measure.  I marked my quilting lines with "disappearing" ink and a four-foot aluminum straight-edge my father-in-law bought me for Christmas (because I was always borrowing his).


I put the last (poorly-executed) hand stitch into the back of the binding at 5:15 AM, and promptly fell asleep.  Got up at 7:00, took a quick shower, and headed over the river (late) to the STLMQG's big reveal.  I was originally pretty upset with the quilt.  The center was a crumpled mess from all of the lumpy seams jutting out everywhere, and the stark contrast of the smooth, unwashed, all-white border only served to emphasize this (along with the scatter of pockmarks remaining from the barrage of safety pins left in the fabric up until just a few hours before).  But, once I got it home and washed it, it wasn't so bad.


All in all, it was a fun challenge.  I still need to break my procrastination curse.  And learn how to turn a proper binding.  (Seriously...  Will SOMEONE show me this stitch in person?!?)  And, the next time I make one of these (and, yes, there WILL be a next time), I'll scale the block back up, extend the pattern all the way to the edge of the quilt, and definitely bring "the hammer."  But, for now at least, I can say for certain, that it's definitely going to be a while.