I wanted to embellish the outside with a little something to give it character, and this sassy cat seemed just the thing. I found loads of cat images to peruse on Masterfile. Not only do I like the silhouette on this one, the tail is reminiscent of a "J" for her initial. Of course, I had to add red glasses because Joy wears red glasses. (Although, hers look a lot less 'Sally Jesse Raphael' than my version). The cat and glasses are "faux-appliqued" using No-Sew Heat 'n Bond, with fluorescent-green eyes and lining for good measure. I hope she likes it.
 |
| Front panel of Joy's keychain zipper pouch. If you look closely, you'll notice that the cat's eyes glow a fluorescent yellow-green. (Cat design based upon Masterfile image found here). |
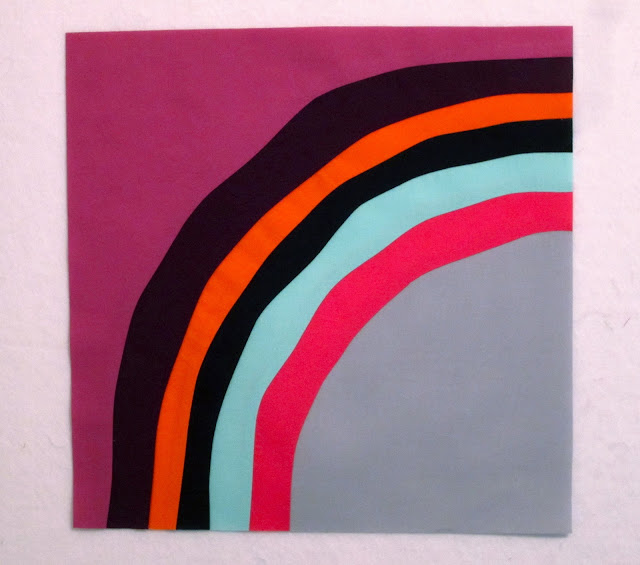
I've had a few other projects kicking around this week. I finished a second wonky quarter-circle block for Val's Heroes Helping Heroes Quilt. This one is a tad wonkier than the first, but not quite there yet. For some reason, I struggle with the wonkus. Must be the chemist in me.
I think she's up to ten blocks received so far. I'm anxious to see how these all come together. If you'd like to join in the cause, there's still time to make a block or two before the deadline. All the details can be found on Val's blog posts here and here.
Finally, I stitched together my first-ever boxy pouch. I used Libby's tutorial from over at Truly Myrtle and some pre-quilted scrap fabric I had laying around for practice (so I could skip the interfacing). It's a good thing, too, because my practice version turned out all catawampus. Instead of the 9" x 4" x 4" dimensions of the sample pouch, mine came out 12" x 4" x 2". The astute among you will see immediately what I missed: I inadvertently swapped the length measurement with the width during construction.
I have to admit to feeling a little cranky while sewing this one. I get a little grumpy with tedium. Still, the minute I turned it right-side out, the grump was gone. This is a nice little bag. Fully-lined, with finished edges on the interior (unfinished edges are a thing with me). I need to go over the math once (or twice) more to make sure I've got it all straight, but I think with the right fabrics, this could be a great little toiletry bag.
Which would be nice, since I can't seem to conquer unfolding my Weekender pattern. *Sigh.*
Have a good Thursday, everyone! :)


you have been busy! Can you show me how to do those improv circles? Miss you!!
ReplyDeleteHey, Cara. Val has a tutorial on her site (http://howaboutpinkplease.blogspot.com/2013/01/wonky-improv-circle-block-tutorial.html), but I'd be happy to show you sometime, too. :) I see so many possibilities with them, but they do eat up a lot of fabric and generate some oddly-shaped scraps.
DeleteMiss you, too! Hope you're all feeling better!
Cute little pouches, I'll have to try those tutorials you listed because the ones I use leave raw edges inside.
ReplyDeleteI think your wonk-less circles are great, super cheerful.
Look at you go, Lady!
How big is that cat? It must be tiny! Your silhouette did a great job cutting it out! I was going to ask the same thing as Cara! Thanks for including the link! I love your second wonky block, it looks wonky enough to me! And I love your boxy pouch! Great projects Lynne!
ReplyDeleteThanks, Ladies. Kelly, I cut the cat out by hand. First, I ironed the Heat 'n Bond to the back of the fabric. Then, I printed the cat image on freezer paper which I then pressed to the front of the fabric (Carefully... Used a press cloth so as not to transfer the ink to the iron). By that time, the fabric was good and stiff, so I just used scissors and my Exacto knife to cut out the cat.
DeleteSuper cute pouchs! You know, the boxy one seems just the right size to toss a curling iron in while traveling. I just know you did that on purpose, you sly devil.
ReplyDeleteEither that or a pork tenderloin! :)
DeleteVery sassy! I'd like to try your transfer method- which side of the freezer paper do you print on?
ReplyDeleteI print the design on the dull side of the freezer paper, then press the glossy side to the fabric.
DeleteBetween that and the Sew 'n Bond/Heat 'n Bond, it's much easier to cut your pieces precisely. Have to be careful to keep a pressing cloth or something between the laser-printed design and the iron. Otherwise, the ink gets everywhere.