Thursday, June 27, 2013

I love you. I want you. I want some tea, please.

For years, I never carried a purse.  I'm really more of a keys-and-ID-holder type.  But, now I have kids, and, kids require stuff, particularly when you're out in public:  tissues, sunscreen, clarinet reeds.

(Wait.  That's just my kids?)

Standard-issue ID holder.  (Black)

With the litany of new Scrip cards and library cards, I barely have room for my collection of VIP membership cards to the local fabric stores, which has forced me to upsize from my trusty ID case to one of those clunky old checkbook jobbies the size of a Birkenstock.  (Just happened to notice as I sit here lamenting my un-moisturized heels that my clog and my wallet are effectively the same size).

New(ish), clog-sized wallet.  (Black)

Add this to our recent upgrade from "dumb phone" to iPhone, and it turns out the $4 purse I bought at Michael's last year on a whim just won't cut it anymore.  To give you an idea of how dire my accessory dearth is, the only two purses I own are this black one, and the beige one just like it I bought at the same time:  

Sad-sack Michael's purse.  (Also black, shown here with its beige buddy).

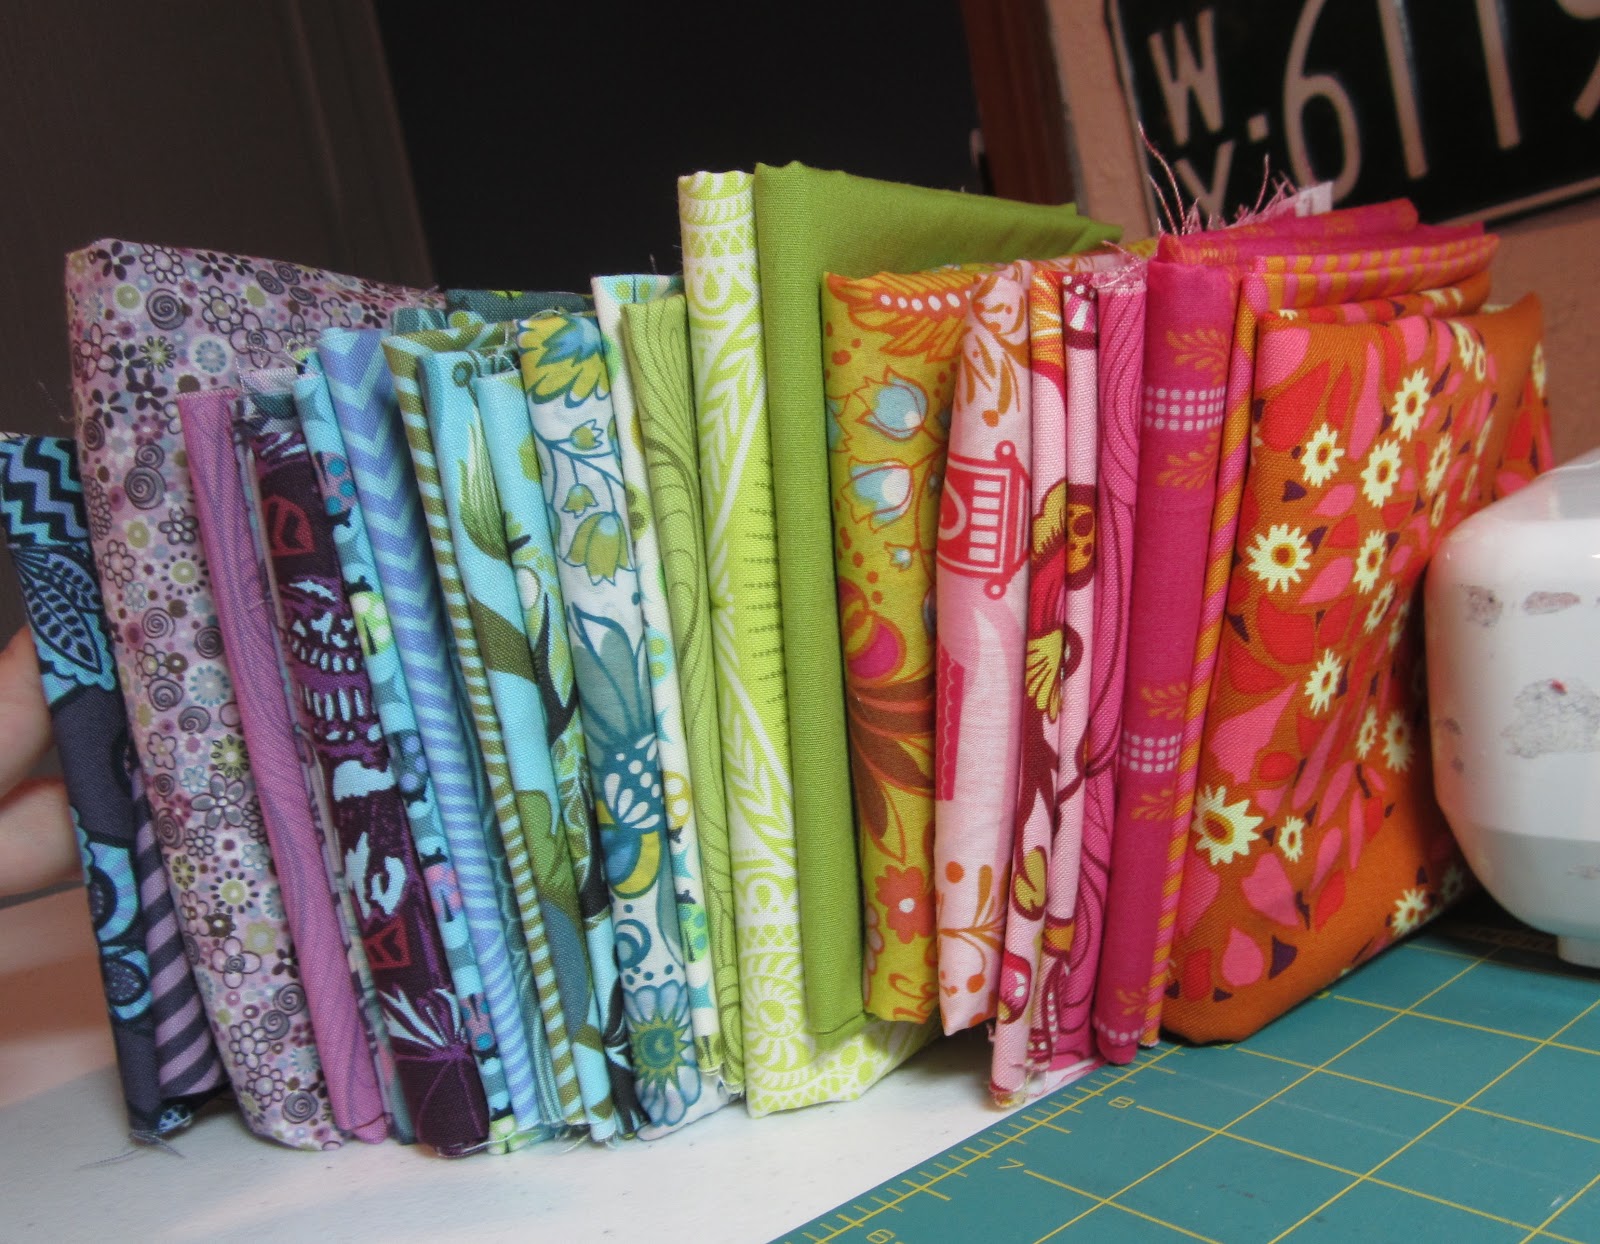
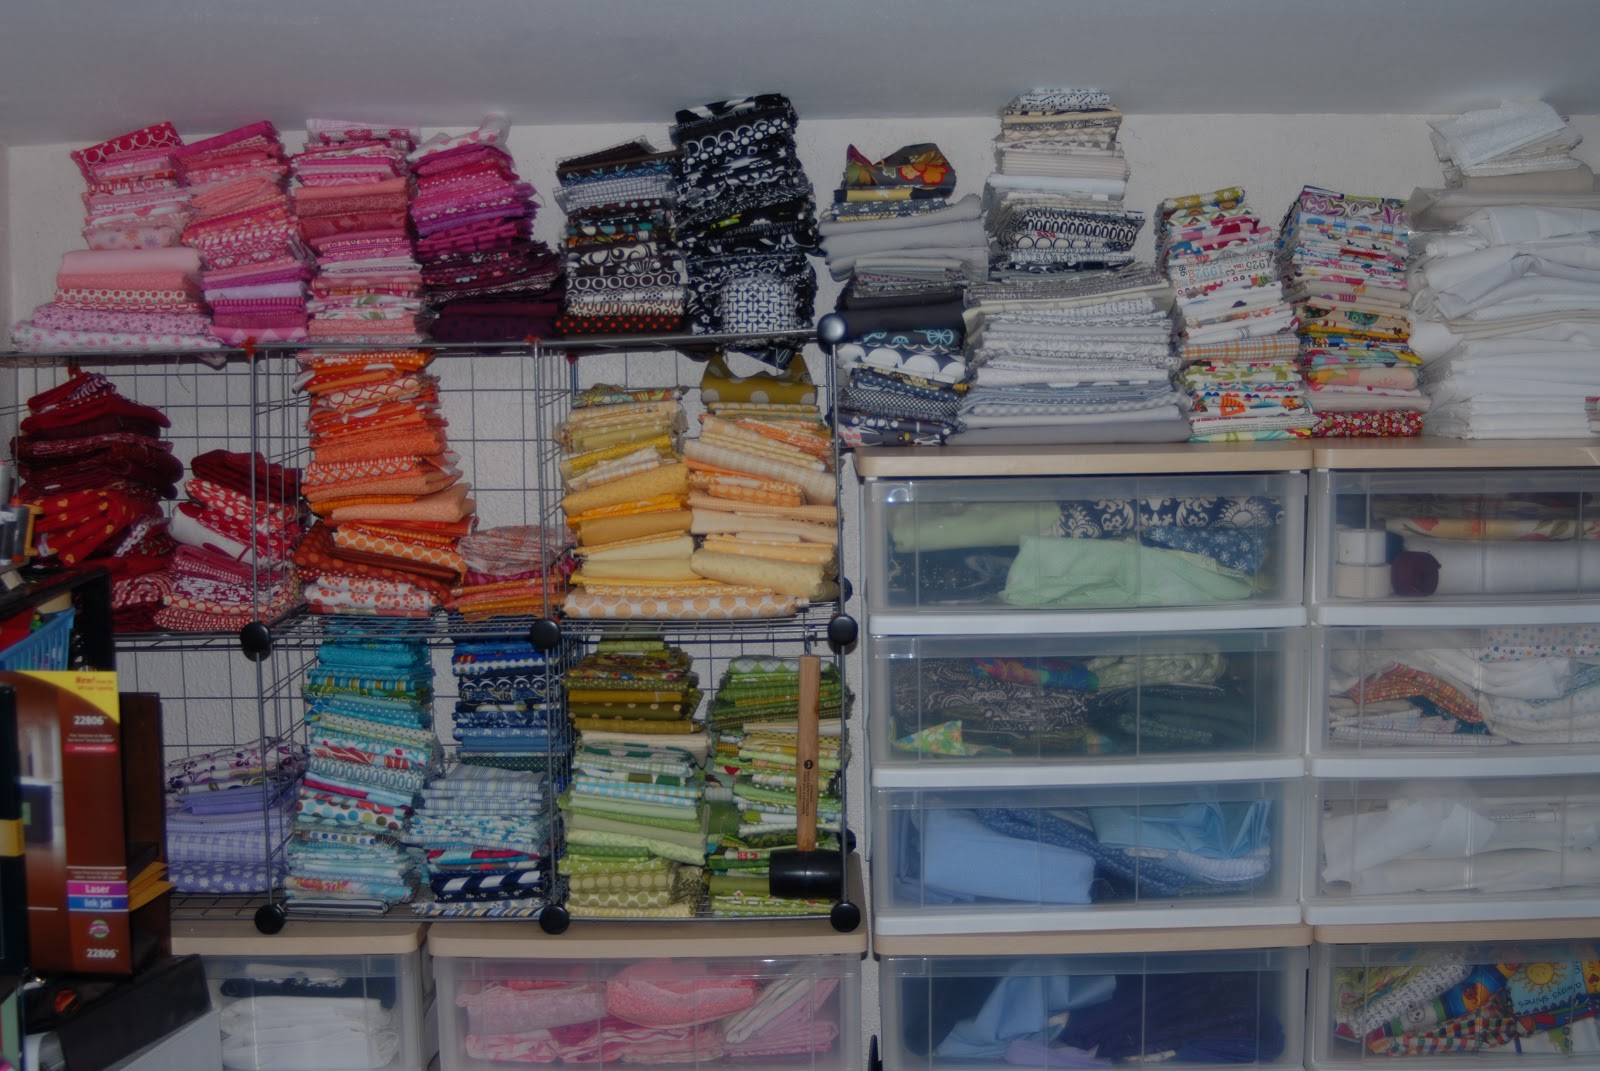
So, I got to thinking...  Why not MAKE a purse?  I've got all this beautiful fabric stashed away in my sewing room.  Surely, I can find a pattern for a purse that I like!  Right?  RIGHT???

Um, no.  Actually.  Not so much.

I don't like floppy purses.  Tote bags, yes, but purses, no.  I want my purse to have structure.  Enough structure for me to snatch my clog-wallet in and out without issue.  Enough structure that the OtterBox case my husband bought to ostensibly protect our new phones won't also simultaneously maximize its adhesion to every possible surface under the sun.

Also, I want a zipper.  Maybe a magnetic closure, but even that's a little too "peek-a-boo" teaser for me.  If I'm carrying private stuff, I'd like it to stay private.

Finally, I want a shoulder bag.  Not a handbag.  Not a clutch.  If I wanted to inflame my arthritic "hot-dog fingers," I'd just carry my crap around in my hands, the way I used to.

So, I know what I want:  a structured shoulder bag, with a zipper, big enough to hold a clog-wallet and smart phone.  I narrowed and narrowed and narrowed my search, and eventually landed on THIS.  WITH tutorial (bonus!):

  
Cute, right?  (And, GREY!  Branching out a little, yes?)  Bag and tutorial by Arina Rasputina

Which I LOVE.  Super-cute, somewhat conservative, and I can customize the strap length so I can wear it over my shoulder but tuck the body of the bag under my arm.  Discreet, not too showy, and big enough to lug around all of my goodies from home.  There's only one problem.

The tutorial is in Russian.

(Of course it is).

Now, it turns out, I speak a little Russian.  VERY little Russian, and unfortunately none of the sewing variety.  I can say, "I love you."  "I want you."  And, "I want some tea, please."   But somehow, phrases like, "Insert the exterior right-side-out into the interior, right-sides-together," never came up during my Russian-speaking phase.

So, Google Translate to the rescue!  (Sort of).  Translating metric units to English was no problem.  I use metric for a living.  Working out the mathematical ratios used to determine the size of each pattern piece based upon desired measurements of the final bag was a tad trickier, but I managed.  Unfortunately, now that I've arrived at the meat of the tutorial-- construction of the body of the bag--I'm kind of at a loss:

"Add up the details of the basics and wrong sides of the padding, glue the middle of a spider web, and in places fillets.

Note the four sides midway parts combine, cutting away. Durable double thread sew details over the edge.

!Joint width should not exceed the size of the allowance, or after grinding parts on the outside of the car will be visible hand stitches!"

I don't know about you, but the exclamation points lead me to believe that this is KIND of a key passage.  And, I clearly don't want my hand stitches to be visible once I'm finished grinding parts on the outside of the car.  

?!?

Thankfully, there are a number of photographs to go along with the text, which are quite useful, until you come to sections like this:

"Turn inside the bag, stripped by hand, wrapped in a towel.   :)  (unfortunately this process is impossible to photograph)."

The smiley face translates.  The fact that this process is impossible to photograph translates.  And, yet I'm pretty sure this woman didn't complete her bag wrapped in a towel after stripping by hand.

*Sigh*

So.  In light of my stubborn streak, I will likely continue to chip away at this until I work it out, one way or the other.  In the meantime, if anyone knows of a great tutorial for a structured shoulder bag, with a zipper, big enough to hold a clog-wallet and smart phone:

Я люблю тебя.
Я хочу тебя.
Я хочу чаю​​, пожалуйста.

;)


Sunday, April 21, 2013

No more hurting people.


Fill the world with beauty...


...till there's room for nothing else.


The St. Louis Modern Quilt Guild will collect pennants for Boston at our May meeting.  For more information on how you can help, please visit the Vancouver Modern Quilt Guild website.

Saturday, March 23, 2013

I Spy... Bad karma (chameleon)?

I finally pulled some solids for Aidan's "I Spy" quilt.  They're a little "rainbow" for me, and I'm not sure how many will end up in the final product, but Aidan really likes them for now.


For the first time in my quilting life, I'm (thinking about) making BIG blocks:  13.5" finished.  I need a quick way to cover a full-sized bed with minimal quilting so that the end result is soft and fluffy.  This quilt by Erica over at Craftyblossom is my inspiration.   I LOVE the Echino, and her understated color palette, but Little Man likes to be "all colors of the rainbow."  :)  I estimate that her blocks are ~11.25" across (Echino glasses ~9.4 cm, or 3.7"), and I do like the scale, so I may end up shrinking mine to that size if things feel a little too sparse once the blocks go together.

Linen/Echino quilt by Craftyblossom.

I auditioned these two tonight, but I'm still undecided.  I need a few more on the design wall before I make up my mind.


One thing I did spot was an unfortunate fussy cut:


It's actually "1999," but it suuuuure doesn't look like it.  I'm not particularly superstitious, but I don't think I can bring myself to sew this into his quilt.  Can't you just see him at show-'n-tell?

"I spy with my little eye... demonic numerology!"

Nice.

***


I've also had to fire up the flux capacitor this week to get ready for the "I *Heart* the '80s Swap" underway on Flickr.    You've probably seen a few of these pieces floating around Blogland: the Billy Idol quilt"Save Ferris" pillow, and Mix Tape Mug Rugs (genius).  For me, the '80s were about TV, movies, music and bangs.   I'll spare you the bangs (for the moment), but did put together a quick mosaic of some of my '80s favorites:


Unfortunately, my partner was...  Less specific.  She said only that she was born in 1984, so "late '80s might be best."  That narrows it to...  What?  Boy bands and Ninja Turtles?

I tried stalking her blog, to no avail.  She likes "Geocaching," (which--if I understand correctly-- is basically a GPS-assisted, world-wide scavenger hunt), but the only crafty items I found were a few small embroidery pieces, none of which had anything to do with the beloved decade of my youth.  After weeks of digging, I finally found her on Pinterest, along with one of my favorite cartoon quotes of all time, which I promptly stitched up... Disco style:


I know it doesn't exactly scream '80s, but Calvin first hit the funny papers in 1985, and his euphoria-demanding stance fits right in with that Alex P. Keaton Reaganomics mindset we all know and love.  Besides, anyone born in '84 is really a child of the '90s.  She can't possibly remember Lloyd Dobler's boombox serenade, Magnum P.I.'s Hawaiian shirts, David Addison's boxer shorts.  And, I couldn't pick a boy band out of a lineup, let alone a Ninja Turtle.  So when in doubt, stick with the classics.  :)


As for this guy, I'm not quite sure what to make of him.  I was going to frame him up in a small hoop, but I'm kind of digging the giant field of "disco dots."  Maybe a small pillow 'bedazzled' with friendship pins?  Or back him in fleece as a giant legwarmer?  Regardless, I'll have to hit the thrift shop later this week for some gen-u-INE '80s memorabilia.  Otherwise, the only memento I can send with my package is a Christmas Ball pic, circa 19__.


And, nobody wants that.

Friday, March 22, 2013

Follow my blog with Bloglovin'

For whatever reason, I can't get the Bloglovin' link to post as a link.  Nonetheless, the Bloglovin' website claims this will work if I leave it as-is.  (Seriously?  Talk about buying into something sight-unseen...)

So,I'm drinking the Koolaid.  Could someone please let me know if this works in any way?

<a href="http://www.bloglovin.com/blog/4975889/?claim=wzqxkd3uk2m">Follow my blog with Bloglovin</a>

Thanks!

Sunday, March 17, 2013

Best laid plans...

I'm a planner.  Always have been.  Big plans.  Grand plans.  My in-laws mock me.  "Gotta have a plan."  Still.  A plan is important.  A plan gets you out of bed in the morning.

I've been planning spring break since...  Well...  Since I caught this crappy teaching assignment. Since before then, actually.  Since LAST spring break, when both of my offspring got stomach plague.  So, yes.  I had a plan for spring break.  You could say I had an uber plan.

But then, the fever hit.  Two, actually.  Little man for a couple of days, then Em... For a week. Not just a fever, mind you.  An uber fever.   A 104-degree fever.  A "quick, get her into the shower" fever.  The kind that leaves you shaking and weak in the knees, and you're not even the sick one.

Still.  I was grateful.  It wasn't a stomach bug.  I told everyone I knew, "Yeah, I had plans." And, "Sure, it's a shame.  But at least it's not a stomach bug."

The stomach bug hit yesterday.  And, today.  And from the looks of it, will likely stretch well into tomorrow.  If it's just the one.  If we've managed to effectively wash and bleach and quarantine everyone and everything in our tiny domicile before the OTHER one's exposed.

So.

In lieu of planning for the next spring break-- exercise in futility that is-- I think I'll cover life since my last post so that next week-- when the biosafety level has dipped back beneath a two-- I'll (hopefully) be ready to post some real progress on something.*


*...provided I dodge the stomach bug.


Pretty Little Pouch Swap:  Made  

For Cindy (Flickr name: yayaquilter) who blogs over at Daisy Days.  Cindy loves hand embroidery, paper piecing, birds, linen, green and blue.  I spotted a pillow on the internet with this little guy on it (can no longer find the source), and managed to work out the paper piecing.

Anyone recognize this?  I'd like to credit the source.


I ran a little short on lining fabric, so I left Cindy a secret message for the pouch interior.  I like the end result.


The font is my latest love:  Janda Someone Like You, by Kimberly Geswein.  


After tucking a few goodies inside, I managed to get this into the mail only a day or two late, which is "early" given my history in swap participation.  :)


Pretty Little Pouch Swap:  Received


Green?  Love.  Essex yarn-dyed linen in black?  Scrappy patchwork?  Love.  Many thanks to Gabriela (Flickr name:  Lilac and Rose) who blogs over at Ten Things I Love for this super-cute zipper pouch.  I'm already using it to tote along an embroidery project!


You are My Sunshine 

The first time I sang You are My Sunshine to the Little Man at bedtime, he cried.  He said the whole song made him happy, except the last line.  "Mommy, I won't take your sunshine away. Can we sing it different next time?"  Since then, every night when I tuck him into bed, we end the song with the phrase, "Won't you be my sunshine today?"

I thought it might be nice, for the occasional nights I can't tuck him in, that he have a small pillow with the lyrics stitched on it.  It's a simple improv quilt-as-you-go using bits and strips from my yellow scrap jar.  The inspiration pillows here and here are two of my all-time favorites, by Cori over at Let's Eat Grandpa (LOVE that blog name...  Punctuation saves lives).  :)


The question that remains:  How and where do I add the lyrics?  Do I...

(a) spiral them outward from the white "sun?"
(b) stitch them as "rays" projecting from the white sun?  Or...
(c) stack them as typical stanzas on the bottom-right-hand side of the pillow?


LouBee Sampler:  Pincushion Block

This year, the Lou Bee girls are making a sewing-themed sampler quilt.  Each month, one member chooses/designs a paper-pieced block for each of the others to make using fabrics from their own collections.  We have some pretty great blocks so far:  sewing machines, spools, fabric stacks, even a sexy boot puttin' the pedal to the metal (which I will surely alter into a bootie sock, as I'm hardly hip enough to pull off the sexy boot action).  ;)

Although this round began back in August, I'm a tad behind, so I've only just managed to pull my fabrics:


It's mainly Tula Pink The Birds & The Bees, but there are a few pieces of Anna Maria Horner (Field Study and Little Folks voile) along with some Joel Dewberry (Aviary 2) and Robert Kaufman (London Calling cotton voile in sorbet).  The current plan is to pair these up with grey and white, although at the moment the overall layout is still highly, highly negotiable.

March was my month to contribute a pattern, so I decided to try my hand at a paper-pieced version of a pin cushion.  My first attempt was WAY too big, but after scaling it back a bit, I think it should finish close to the preferred size of 15-18 inches once I add some negative space.


I tried to finish a sample block in time for our last guild meeting, but sadly, that fell at the end of spring break  :/   I did manage to complete half of the wedges, though, and hope to finish the rest soon.  I'm not crazy about the letters I've pieced, but the ladies assure me they will do. Provided things come together as planned, I hope to mail the paper templates out by the end of the month.


In other news...

I gave Em her first sewing lesson:


And picked up a machine for her to use this summer (thanks for the tip, Rene!):


Repaired my collapsed fabric shelves (see background of above photo):


Reorganized my fabric (solids get their own shelves):


Commissioned a snow man:


Discovered a new quilt shop:


Pulled fabric for the Modern She Made Swap (will likely become a New York Beauty):


Picked my next two applique projects:

                                                                                                         OSHA-approved safety glasses will be included.


And survived two significant milestones:


Imagine what next spring will bring.

Wednesday, February 13, 2013

Madrona Road Turtle

(Chelonoidis Madronas)


I reached milestones this week on three distinct fronts:  land, sea, and sky.

The first (sea) was Darwin, my entry for the STLMQG's Madrona Road Challenge:

New species:  Chelonoidis Madronas.  Charles Darwin's observations of giant tortoises in the Galapagos Islands helped to develop his theory of evolution.  

After several failed design attempts working with this line, I finally came up with a plan.  I was browsing through my file of PDF patterns when I came across the Star Flower Pillow from Moda Bake Shop by Aylin Öztürk.


Star Flower Pillow front, Moda Bake Shop.
I liked the angular patchwork of the dodecahedron, and the scalloped chevrons around the edge.  I thought at first I might just make a pillow, plugging in scraps of Madrona Road along the way.  But the more I stared at this photograph, the more familiar the pattern seemed until I realized what I was seeing:  the angular, top-down view of a Galapagos tortoise.

Image borrowed from here.


Having never earned a structural engineering degree, I had no idea how to build such a lumpy, three-dimensional object.  A quick Google search revealed plenty of turtles, but none that I liked as much as these cuties designed by Ashley over at Make It & Love It:

Image borrowed from here.
Ashley generously offers a free PDF of the pattern with paper templates on her website. The dome of the shell is constructed in quarters, the pattern for which is placed on the fold prior to cutting such that it represents one-eighth of the total area of the shell.  By bisecting this pattern with an arc and adding in patchwork, I hoped to achieve an angular, 16-sector hexadecagon similar in design to Aylin's pillow above.

After sketching in the approximate pattern for paper piecing, I enlarged the pattern pieces to 250% at the local copy shop, and auditioned fabrics for the patchwork on the design wall.


I stacked each segment of patchwork in numerical order to keep them straight.  

One stack of fabric per sector.


The first sector stitched together.


Once the first four sectors were stitched, I lined them up side-by-side and started to get excited.  Seams were matching up, and things were starting to look the way I'd imagined:

First four sectors side-by-side...  Looking good so far.

It's this moment, I think, that first drew me to quilting.  That moment when you successfully transform a rough idea into a tangible reality holds much appeal to me.  My problem is that once that light goes on, I sometimes have a hard time drumming up the will to chug through the tedium to the finished product. Thankfully, there were still enough unknowns about the construction of this thing to keep my curiosity piqued.  

I managed to finish up all sixteen sectors, and stitched together the first individual quadrant.  


Fortunately, the seams all lined up correctly which helped spur me on to finish the other three.  Now, I could finally move on to the extremities.  The Little Man was more than happy to help me stuff:


Once the head, feet and tail were attached to the shell, I cut out the base prior to final construction.  That's when I remembered that the challenge rules required each project to have some quilted component.  (@#$%!)  With no simple option for quilting the shell, I slapped the base onto some Warm 'n White and free-motioned a quick floral design.  It was just a last-minute formality, but I think this little detail serendipitously turned out to be one of Darwin's most charming traits.  :)


Two twenty-ounce bags of Poly-Fil later, and Chelonoidis Madronas was born:


Top-down view of Darwin's shell, perched on the seat of an office chair.  

Though not nearly as large as his Galapagoan predecessors, Darwin's size does leave me somewhat concerned about the inevitable propagation of the species.  Perhaps we'll start out with a few tiny offspring, and see where we go from there.  In the meantime, I doubt he has much time to be lonely.  He's keeping some very good company at our house, and serves as a pleasant reminder to us all:  "Slow and steady wins the race." 


- - - - -

I hope to check in later this week with additional (land and sky) updates.

Happy Wednesday!